雑記
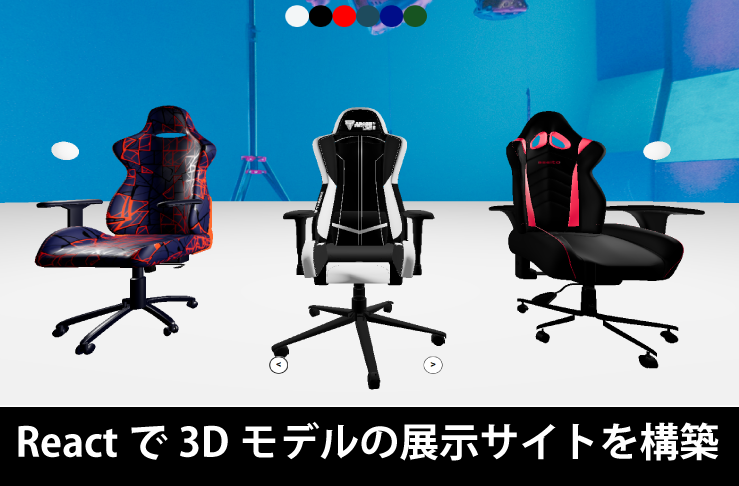
Reactで3Dモデルの展示サイトを構築
イブリン
更新日:2022/11/01
3Dモデルを使用した自社サイトを立ち上げたいと思い研究を始めました。
以前に3Dモデルを使用したサイトが社内で一部好評だったので、そのときに出た案をもとに改良することにしました。
今回は以前出た2点を解決する&今後Webサイトで公開することを見越してReactを使った開発に挑戦しておりますので、
一部Reactの紹介もします。
<前回出た案>
・カラーバリエーションを変えれるようにしたい
・商品を動かすのではなくカメラのパンニング機能を使ってボタンなどで簡単に動かしたい
<元の研究内容>
完成品の紹介
※動画の処理が重いため、動画ではかくついていますが、実際はもっとなめらかです
動作環境
package.jsonファイルに記載されたバージョン一覧です。
|
1 2 3 4 5 6 7 8 9 10 11 12 13 |
"@react-three/cannon": "^6.4.0", "@react-three/fiber": "^7.0.24", "@testing-library/jest-dom": "^5.11.6", "@testing-library/react": "^11.1.2", "@testing-library/user-event": "^12.2.2", "react": "^17.0.2", "react-dom": "^17.0.2", "react-postprocessing": "^1.4.0", "react-scripts": "^5.0.1", "react-three-fiber": "^5.1.5", //@react-three/fiberと同じだが非正規版 "three": "^0.145.0", "use-cannon": "^0.5.3", //@react-three/cannonと同じだが非正規版 "web-vitals": "^1.0.1" |
React-three-fiberについて
ReactでThree.jsを扱うためのライブラリで、Reactの宣言的な記述に合わせてWebGLシーンを構築することができます。
※興味ある方はこちらの記事がとてもわかりやすいので見てみてください
以前three.jsで作成していたため、コード量と難しさを桁違いです。
three.jsで挫折した方も、
Reactが理解できればReactコンポーネントのようにThree.jsが書けるので簡単に3Dシーンが構築できます。
Reactのインストール方法
React17.0.2のバージョンの場合は@17.0.2をつけてください
|
1 |
npx create-react-app (ファイル名) |
React-three-fiberのインストール方法
|
1 |
npm install three@0.145.0 react-three-fiber@5.1.5 use-cannon@0.5.3 |
※もしreact-three-fiberやuse-cannonに問題があれば、正規版のインストールをしてみてください
|
1 2 3 4 |
npm install @react-three/cannon@6.4.0 //インストールエラーが起きた場合は以下の記述をしてください npm install @react-three/cannon@6.4.0 --forece |
|
1 2 3 4 |
npm install @react-three/fiber@7.0.24 //インストールエラーが起きた場合は以下の記述をしてください npm install @react-three/fiber@7.0.24 --forece |
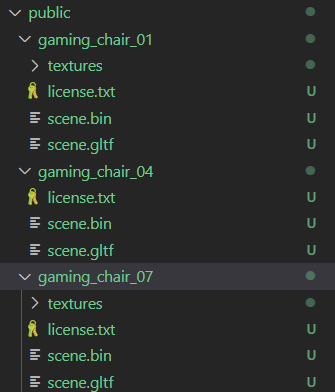
ファイル構成
1.3Dモデルを読み込む
|__node_modules
|__public
| |__gaming_chair_01 //3Dmodelを挿入(この中にgltfファイルを入れる)
| |__gaming_chair_02 //3Dmodelを挿入(この中にgltfファイルを入れる)
| |__gaming_chair_03 //3Dmodelを挿入(この中にgltfファイルを入れる)
|__src
| |__components
| |__CameraButtons.jsx
| |__CameraControl.jsx
| |__Chair.jsx
| |__ColorPicker.jsx
| |__Dragable.jsx
| |__App.css
| |__App.js //メインjs(他のコンポーネントを統合して表示)
| |__App.test.js
| |__index.css
| |__index.css
| |__state.js //追加js(カメラ機能の際に導入)
|__.gitgnore
|__package-lock.json
|__package.json
|__README.md
2.完成形ソースコード(App.js)
メインのApp.jsの構成を説明します。
|
1 2 3 4 5 6 7 8 9 10 11 12 13 14 15 16 17 18 19 20 21 22 23 24 25 26 27 28 29 30 31 32 33 34 35 36 |
import "./App.css"; import { Canvas } from "@react-three/fiber"; import { Suspense,useEffect,useState } from "react"; import ColorPicker from "./components/ColorPicker"; import Chair from "./components/Chair"; import CameraControls from "./components/CameraControls"; import CameraButtons from "./components/CameraButtons"; function App() { return ( <div style={{ height: "100vh", width: "100vw" }}> <ColorPicker /> <CameraButtons /> <Canvas gl={{ powerPreference: "high-performance", antialias: false, stencil: false, depth: false, }} shadowMap style={{ background: "black" }} camera={{ position: [7, 7, 7] }} > <Suspense fallback={<Spinner />}> <Background windowDimensions={windowDimensions} /> </Suspense> <CameraControls /> <Chair /> <Floor position={[0, -0.5, 0]} /> </Canvas> </div> ); } export default App; |
モデルのインポート
1.モデルを準備
モデルを使用する方法は主に2種類あります。
そのどちらかの方法で3Dモデルを入手してください。
【ケース1】Blenderで作成されたオブジェクトを使用する場合は、ファイル形式はgltf形式にしてエクスポートしてください
【ケース2】外部サイトからダウンロードする際も同様に、ファイル形式はgltf形式を選択
※3Dモデルおすすめサイト https://sketchfab.com/
2.モデルをファイル内で設置
モデルgltfファイルをpublicフォルダー下に設置
3.3Dモデルを読み込む
3Dモデルを読み込むための、Chairコンポーネントを作成
|
1 2 3 4 5 6 7 8 9 10 11 12 13 14 15 16 |
import { Suspense } from "react"; import Model from "./Model"; const Chair = ({}) => { return ( <Suspense fallback={null}> <Model path="/gaming_chair_01/scene.gltf" scale={new Array(3).fill(0.01)} position={[0, -1.5, -1]} /> </Suspense> ) } export default Chair; |
4.モデルコンポーネントを作成
CompornentsにModel.jsxを作成
|
1 2 3 4 5 6 7 8 9 10 11 12 13 14 15 16 17 18 19 20 21 22 23 |
import { useLoader, useFrame } from '@react-three/fiber'; //gltf形式を読み込むために使用 import { GLTFLoader } from 'three/examples/jsm/loaders/GLTFLoader'; //three.jsを使用 import * as THREE from 'three' const Model = props => { const model = useLoader( GLTFLoader, props.path ) //Chair.jsxで指定したモデルを追加(モデルの表示・大きさ・位置を反映させる) return ( <primitive object={model.scene} scale={props.scale} position={props.position} /> ) } export default Model; |
追加したカラーバリエーションに変更
カラーバリエーションを変更するために必要なポイントは、以下の2つになります
1.パーツの認識
2.カラーバリエーションの設定
1.パーツを認識
カラー変更する箇所を選択するためには、カラー変更箇所のパーツを認識させる必要があります。
|
1 2 3 4 5 6 7 8 9 10 11 12 13 14 15 16 17 18 19 20 21 22 23 24 25 26 27 28 |
・ ・ ・ /***省略***/ useEffect(() => { controlsRef.current.addEventListener( 'dragstart', e => { e.object.api?.mass.set(0) console.log(e.object) } ) controlsRef.current.addEventListener( 'dragend', e => e.object.api?.mass.set(1) ) controlsRef.current.addEventListener( 'drag', e => { e.object.api?.position.copy(e.object.position) e.object.api?.velocity.set(0,0,0) } ) }) /***省略***/ ・ ・ ・ |
◎パーツの取り外し
1つのオブジェクトから、パーツを取り出し、どんなオブジェクトでも移動できるようにします。
そのためには、物理APIがあるかどうかにかかわらず、条件付きで物理プロパティを呼び出します。
Javascriptではキー末尾に?(クエッションマーク)をつけることで、そのオブジェクトに定義されているかどうかわかります。
もしそうでなければ、残りの部分の呼び出さないようにします。
◎パーツオブジェクト名を取り出す
オブジェクト名を取り出す際は、console.log(e.object)を入れると、オブジェクト名を取り出すことができます。
ここのnameに記載されているのが、パーツオブジェクト名です。

◎パーツを1つのオブジェクトにまとめる
1つ1つのパーツを、transformGroupでまとめることによって1つのオブジェクトとして動かすことができる
|
1 2 3 4 5 6 7 8 9 10 11 12 |
/***省略***/ return ( <group ref={groupRef}> <dragControls transformGroup={props.transformGroup} ref={controlsRef} args={[children,camera, gl.domElement]} /> {props.children} </group> ) /***省略***/ |
Chair.jsでDragable.jsを読み込む
|
1 2 3 4 5 6 7 8 9 10 11 12 13 14 15 16 17 18 19 20 |
import { Suspense } from "react"; import BoundingBox from "./BoundingBox"; import Model from "./Model"; import Dragable from "./Dragable"; const Chair = ({}) => { return ( <Suspense fallback={null}> <Dragable transformGroup> <Model path="/gaming_chair_01/scene.gltf" scale={new Array(3).fill(0.01)} position={[0, -1.5, -1]} /> </Dragable> </Suspense> ) } export default Chair; |
2.カラーバリエーションの設定
ColorPicker.jsxファイルを作成し、カラーの選択肢候補とカラーアクションボタンを作成できたら、カラースイッチの完成です
◎カラーボタンを作成
カラー候補分作成します
|
1 |
<div onClick={handleClick} style={{ background: 'rgb(243, 246, 247)', ...sharedStyles }} /> |
◎カラー選択時のアクションボタンを作成
カラーボタンをクリックしたら、パーツカラーが変更するよう処理を書きます。
|
1 2 3 4 5 6 7 |
//カラーボタンが押されたらパーツカラーの変更 const ColorPicker = props => { const handleClick = e => { if (!state.activeMesh) return; state.activeMesh.material.color = new THREE.Color(e.target.style.background) } } |
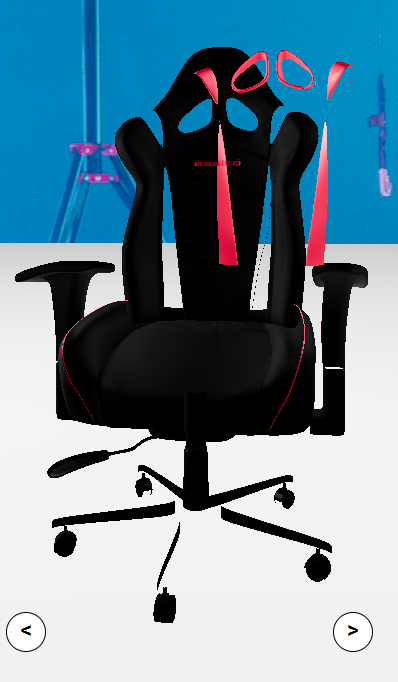
カメラパンニング機能の追加
カメラのパンニング機能とは、左右の矢印ボタンを押すとカメラを水平に360度回転させることができるようにすることを指します。
1.カメラの初期値設定
最初にこの展示会を表示する際に、どの位置にカメラを置くかを状態管理します。
StateというJSファイルを作成
↓
任意の変数を追跡するオブジェクトをエクスポート
↓
それを状態変化させたいファイルにインポート
activeMeshNameには初期で表示させる3Dモデルのパーツ名を入力します。
※このパーツ名は、色を変更するパーツ名と同じ名前にすると分かりやすいです。
このパーツ名を軸に、カメラの位置を指定してカメラポジションを認識するようにします。
|
1 2 3 4 5 6 7 8 9 |
import * as THREE from 'three' const state = { activeMesh: {}, activeMeshName: "Plane_Material001_0", cameraPos: new THREE.Vector3(5,2,6), target: new THREE.Vector3(4,2,0), shouldUpdate: true } export default state |
2.カメラの導入
先程設定した初期カメラポジションと、このあとに設定する指定の位置にカメラを動かせるように
CameraControlsコンポーネントで状態を切り替えられるようにします。
|
1 2 3 4 5 6 7 8 9 10 11 12 13 14 15 16 17 18 19 20 21 22 |
import { useFrame } from '@react-three/fiber' import state from '../state' const CameraControls = ({ }) => { useFrame(({ camera, scene }) => { if (state.shouldUpdate) { camera.position.lerp(state.cameraPos,0.1) scene.orbitControls.target.lerp(state.target,0.1) scene.orbitControls.update() const diff = camera.position.clone() .sub(state.cameraPos).length() if (diff < 0.1) state.shouldUpdate = false } }) return ( null ) } export default CameraControls |
3.カメラボタンの設置
CameraButtonコンポーネントの役割は、以下の2つです。
1.カメラの方向ボタン(矢印ボタン)の設置
2.各モデルごとのカメラポジション設定
◎カメラの方向ボタン(矢印ボタン)の設置
カメラポジションスタイルをconstで定義します
|
1 2 3 4 5 6 7 8 9 10 11 12 13 14 15 16 17 |
const style = { zIndex: 1, position: 'absolute', display: 'flex', justifyContent: 'center', alignItems: 'center', bottom: '5vh', height: '40px', width: '40px', backgroundColor: 'white', color: 'black', borderRadius: '50%', fontSize: 20, fontWeight: 'bold', border: '1px solid black', cursor: 'pointer' } |
上記で設定したスタイルを継承して、ボタンを表示させます
|
1 2 3 4 5 6 7 8 9 10 11 12 13 14 15 16 17 18 19 20 21 22 23 24 25 26 27 |
const CameraButtons = ({}) => { /***省略***/ return ( <> <button onClick={e => handleClick('left')} style={{ left: '40vw', ...style }} > {'<'} </button> <button onClick={e => handleClick('right')} style={{ right: '40vw', ...style }} > {'>'} </button> </> ) } |
矢印ボタンを機能させるために
◎各モデルごとのカメラポジション設定
▼各3Dモデルごとにカメラ位置、モデルごとのカラー変更する部位名を定義します。
|
1 2 3 4 5 6 7 8 9 10 11 12 13 14 15 16 17 18 19 |
const CameraButtons = ({}) => { const sets = [ // model_1 { cameraPos: [5,2, 6], target: [4, 2, 0], name: "Plane_Material001_0", }, // model_2 { cameraPos: [0,2,6], target: [0,2,0], name: "White_Seat_White_0", } ]; /***省略***/ } |
▼カメラ定義されたもの(初期カメラ、矢印ボタン、モデル名)の情報を組み合わせて、ボタン機能を成立させていきます。
|
1 2 3 4 5 6 7 8 9 10 11 12 13 14 15 16 17 |
const CameraButtons = ({}) => { let focusIndex = 2; const handleClick = direction => { if (direction === 'right' && focusIndex < sets.length - 1) { focusIndex += 1; } else if (direction === 'left' && focusIndex > 0) { focusIndex -= 1; } else { console.log('no action') } const num = focusIndex; state.cameraPos.set(...sets[num].cameraPos); state.target.set(...sets[num].target); state.activeMeshName = sets[num].name; state.shouldUpdate = true; }; } |
4.モデルに合わせてカメラの追従
3で設定した各モデルごとのカメラポジションをモデル名で認識できるように、
CameraControlsコンポーネントで条件分岐を付け加えれば、カメラのパンニング機能は完成です。
|
1 2 3 4 5 6 7 8 9 10 |
useFrame(({ camera, scene }) => { if (state.activeMesh.name !== state.activeMeshName) { state.activeMesh = scene.getObjectByName( state.activeMeshName ) || {} } /***省略***/ } |
おわりに
今回のReactを使った3Dモデル表示は、Reactの記法だけでなく、three.jsについてもある程度理解があると
処理の速さや扱いやすさに感動すると思います。
※特にアニメーションの動きをGsap使わなくてもある程度動かせるのは良いです。
今回もつかっていません。
また、three.jsをそのままWebサイトに入れるよりも、Reactで管理したほうが運用コストも下げられていいと思いました。
製品ページにいつか反映できる日が来たらいいな~と思いました。
<関連記事>